Let’s get started!
Its’ time to make our basic tea-towel apron. The great thing about this apron is how easy and adaptable it is. By changing the tea-towel or the twill tape (ribbon, fabric, etc) the whole look changes. And, it’s so easy to add any embellishments you want! For today, we are just going to make the basic version. Later we’ll add more detail.
The Basic Tea-Towel Apron {Tutorial}
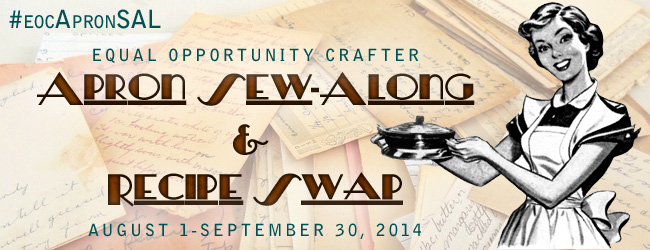
1. Cutting the apron shape. You’ll want to hold the tea-towel up to your body and decide where you want to cut. My towel is 20.5″x29″ so I marked and cut a triangle with a short edge of 3.25″ and long edge of 12″. Keep in mind as you are figuring out where to mark that you’ll need to turn over the edge about another 1/2″, so plan accordingly and cut a bit bigger than you want your finished size to be.
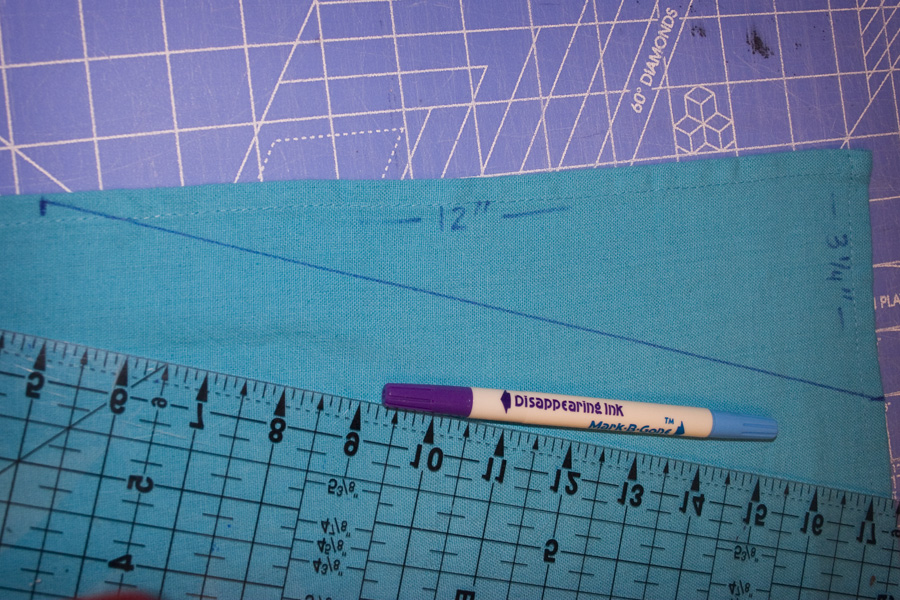
2. Fold cut edge 1/2″ to the Right Side. Typically you fold to the wrong side when you are making a hem, but in this case you will be hiding the edge under your twill tape so fold and press to the right side. I used 1/2″ measurement because my twill tape was 3/4″ wide so I knew the edge would be inside of the tape. Change your measurement as needed based on your tape or ribbon width.
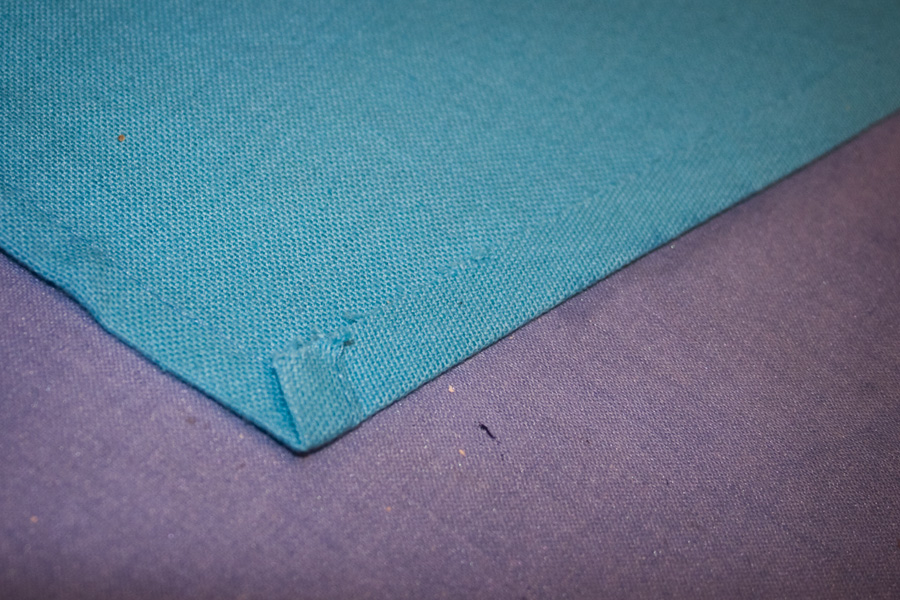 3. Pin your twill tape on. Mark the center of your length of tape, then measure and mark 9.5″ from the center to both sides. Line these marks up to the top edge of the apron. I started with 13″ from the center but found that to be too wide and ended up marking it a few times before I liked it at 9.5″. You may want to try the apron on once you’ve pinned the twill tape and adjust as necessary.
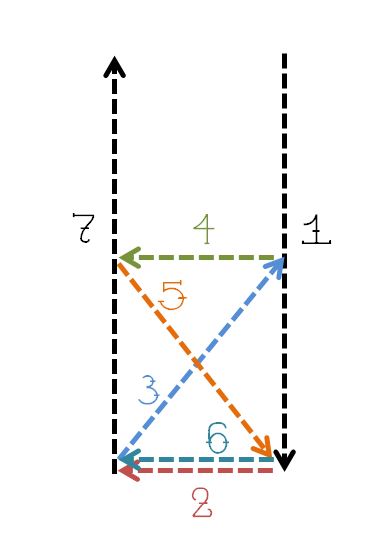
4. Attach the twill tape by sewing along the edges. Reinforce the top and bottom edge with an X-shape. See the video for more details on this step.
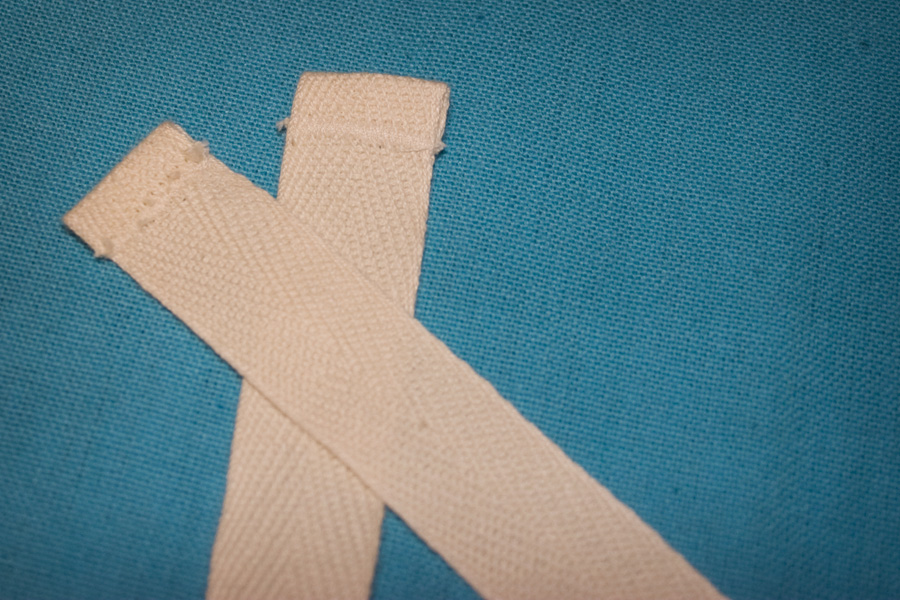
5. Finish the ends of the twill tape. I pressed a hem of 1/4″ and then zig-zag stitched the end down. You could serge the edge, double fold the hem, tie a knot, or depending on the tape or ribbon you are using, you may not even need to finish the end. See the video below for more details on this step.
 That’s it! Check out the video below for more construction details. Also, check back soon for ideas on how to embellish this basic tea-towel apron.
Video Tutorial:
 Apron Sew-Along ::: Basic Tea-Towel Apron - Part 1 [ 12:37 ] Play Now | Play in Popup | Downloads 524
Leave A Comment