Well, I made it to round 3 of the PatternReview.com Sewing Bee! For this round we were all gifted the Rue Dress by Colette Patterns and had to make a garment that can be recognized as a Rue (although we could make changes to it).
{See my full entry here, and the contest gallery here.}
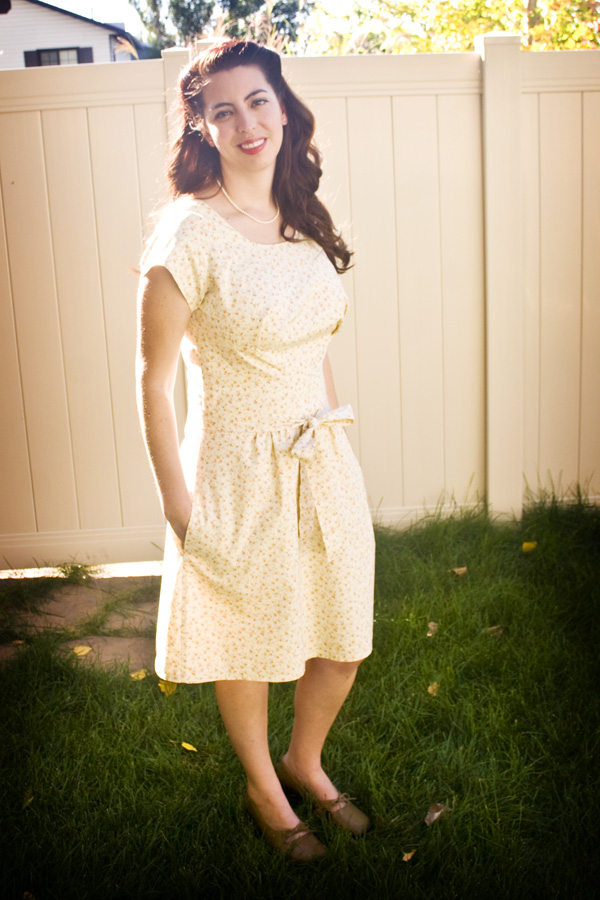
This one was tough for me since the original design wasn’t really speaking to me but once I embraced the challenge of the pattern and decided to go full 1940s on it, it was fun! (I even did the hair and makeup for the photos!)
Pattern Review –>
Did you tweak the Rue Pattern for Fit or Design?
Yes, and Yes! I actually ended up making 4 total bodice muslins before I felt the fit was right. No pattern ever fits me straight off and I usually end up doing an FBA or otherwise adjusting the pattern so this wasn’t unexpected – especially with the unique design lines. At least that means I am now a pro at installing invisible zips and the final dress was easy to assemble since I had so much practice.
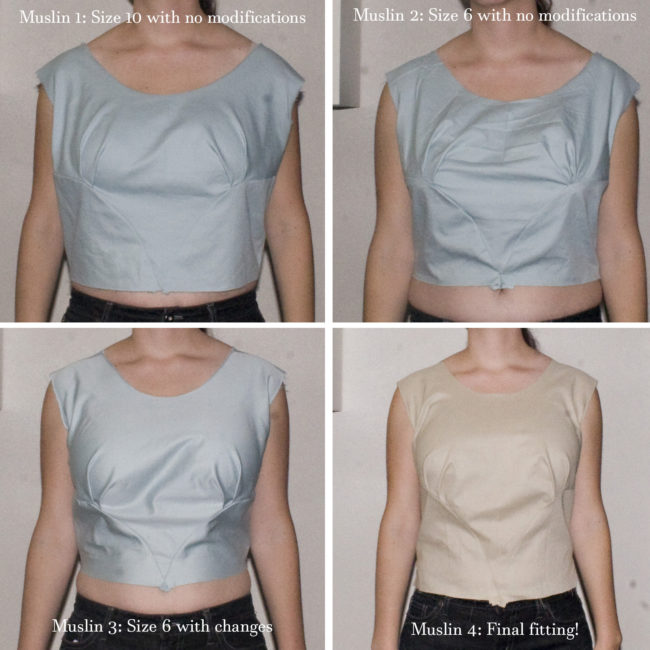
Muslin 1: I decided to really “test” this pattern, so based solely on the body measurements I first made up a bodice muslin in size 10. It was huge!
Muslin 2: Next I went by finished measurements which was a size 6. Again, it was large but much closer in size. I ended up taking it in about 1/2″ on each side seam (total of 2″) which got me the right width but I wasn’t super happy with the placement of the design line and tucks. They did fall exactly where the sew-along blog suggested (5/8″ below the bust point) so it wasn’t a pattern issue, just personal preference. Also, the waistline was very high on me.
Muslin 3: On this one I started with modified version 2 and dropped the upper bust by 2″, added another 1″ to the waist band, increased the height of the back darts, scooted the tucks about 5/8″ to the sides, and added about 1/2″ to the front neckline grading down in the back. This got me a much better fit all around but I realized the band was too tall this way, I needed more length in the upper bodice, and I still needed to tweak the armholes.
Muslin 4: Finally this version came out how I wanted. I ended up sliding the entire upper armband area 5/8″ toward the center and grading them out. The waistband returned to the same height as the original pattern but I did end up shaving the curve down just a bit as well as arching the upper bodice a bit so it fit more snuggly along the ribcage under the bust.
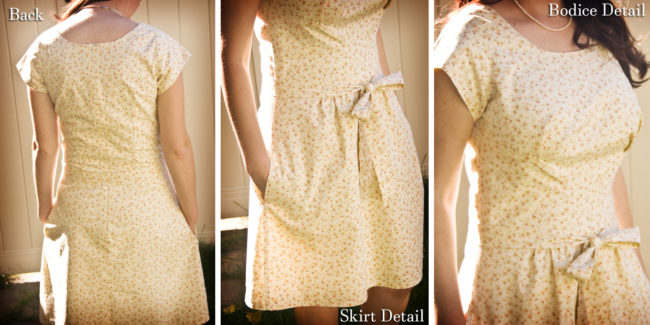
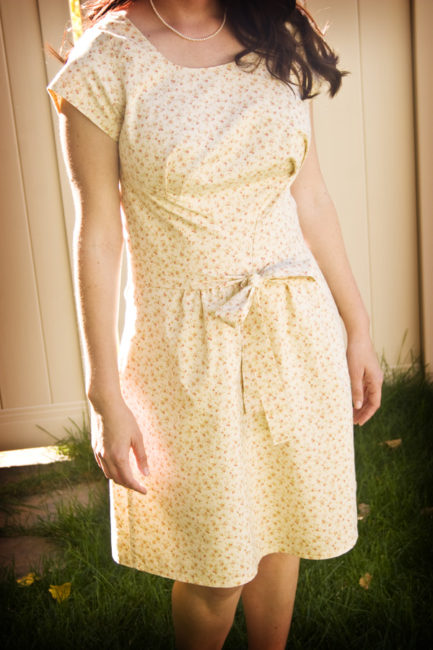
Final Dress: On the final dress I did have to scoop the front armhole out a bit just to make sure the original sleeve fit. I also cut about 5″ off the length of the skirt. Finally I created a 1 1/2″ wide tie to use around the waistband.
One note of caution: Since I lengthened the bodice by a total of 3″ (moving the bust shaping line which also dropped the waistline) I should have moved the pockets up on the skirt. I didn’t realize my error until I tried on the finished dress because I didn’t muslin the skirt portion. Obviously it makes sense now but I wasn’t thinking about it at the time. Also, since I used French seams on the pockets and side seams I wasn’t able to easily move the pockets without completely redoing the skirt, but of course I neither had enough fabric nor stamina to do so.
Describe any trims, embellishments, linings, etc. used to construct your dress
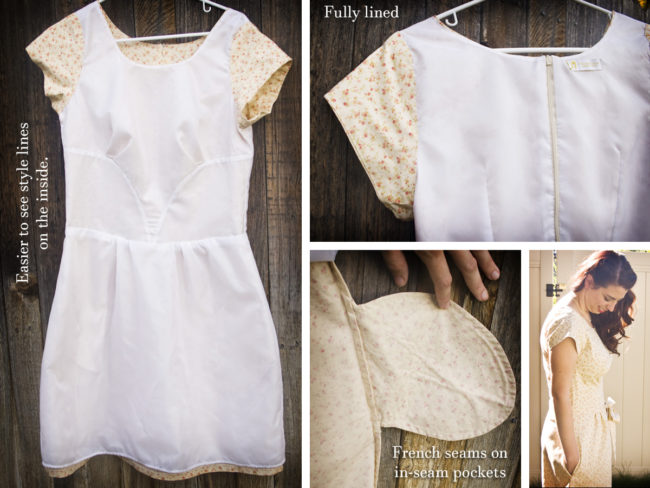
Since I was going for a retro vibe, I used high quality quilting cotton in a light yellow with small flowers for the fashion fabric. I was concerned that the fabric would not be opaque enough for my preference on its own so I fully lined it with polyester lining I already had stashed. I used a cream invisible zipper that was also in my stash. I also created a waist tie using the fashion fabric.
Share your sewing process on this garment. Details please!
After watching “The Couture Dress” class on Craftsy it’s hard for me to let go of the idea of beautifully finished interiors on my clothes. Of course, everything takes longer this way, but boy is it satisfying. Since I was lining my dress differently (line as you go on the bodice), the construction process also changed.
Construction Order:
* Darts on Backs – fabric/lining
* Front to back at shoulder seams (same for linings)
* Front to back at neckline and under-stitch
* Front tucks both fashion and lining together
* “Sandwich” the upper front bodice with the lower front bodice pieces.
* Front to back at side seams, “sandwiching”
* Complete skirt as written
* “Sandwich” skirt to waistband leaving last 2″ on each side. Then stitch those 2″ just the linings together and fashion fabric together. (This way the zipper is only attached to the fashion fabric and I can turn under the lining at the zip.)
* Install Zipper and complete back seams
* Sew sleeves at hem edge and under-stitch. Sew up the underarm seam on sleeve. Ease in the outer sleeve cap to the dress through all layers.
* Turn under inner sleeve cap and hand stitch to lining at armhole.
* Hand stitch lining at zipper tape
* Hem skirt and skirt lining.
* Sew tie band.
* Add 40s style hair and makeup. Enjoy!
Did you use any “new to you” techniques or methods of construction?
I read every book I have on pattern design and fitting to make the changes to the bodice. I also used the line as you go technique (which I used for the first time in round 2 and loved!) and also used hand finishing techniques from “The Couture Dress” class on Craftsy. I also had to completely reinvent the construction order for the bodice so that was fun!
Tell us why this dress should get you to the final round.
I feel like I stayed true to the design of the original Rue dress while tweaking the fit for me. I also embraced the 1940s vibe to really show off the style of the pattern. Finally, the dress is well made and finished.
And one in black and white just to truly embrace the 40s style:

Leave A Comment